
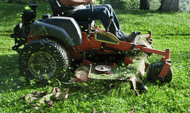
Replacing a worn-out electric power take-off clutch on your Scag commercial zero-turn mower is an essential maintenance task that restores your machine's cutting velocity and reliability. The Scag 461715 part number is a heavy-duty assembly used across popular commercial mowers, acting as the primary gatekeeper that engages your deck blades. Over hundreds of hours of demanding commercial use, extreme thermal buildup and mechanical shock naturally degrade the internal components. By following a structured installation process in your shop, you can avoid costly dealer repair rates and minimize equipment downtime during peak mowing season. This guide outlines the exact mechanical steps required to install a premium replacement clutch onto your Scag mower successfully.
Workspace Safety and Essential Tool Preparation
Working on the lower drivetrain of a commercial zero-turn mower requires strict attention to personal safety and proper workspace organization. Commercial mowers are heavy, complex machines, and because you will be working directly beneath the rear engine deck, you must stabilize the unit before beginning work.
Follow these primary safety steps before reaching for any hand tools:
- Park the Scag mower on a smooth, level concrete floor to prevent rolling.
- Set the manual parking brake levers firmly on both drive wheels.
- Turn the ignition key to the off position and pull it completely out of the switch console.
- Disconnect the main battery cables to isolate the electrical system.
- Pull both spark plug rubber boots away from the engine cylinders to completely prevent an accidental kickback start while turning the lower crankshaft.
Before starting the teardown, organize all necessary tools to keep your project moving efficiently. You will need a metric and standard socket set, the correct size socket for your engine's center bolt, a manual torque wrench calibrated to measure up to sixty foot-pounds, fine-grit emery cloth or sandpaper, a wire brush, high-temperature anti-seize lubricant paste, safety glasses, and heavy work gloves.
Removing the Worn Scag 461715 Assembly
To begin the mechanical removal, you will need a clear line of sight to the bottom of the engine crankshaft behind the rear bumper or beneath the frame.
Follow these operational steps to unmount the old clutch:
- Locate the mechanical deck belt tensioner arm, compress the heavy spring to release belt pressure, and roll the drive belt completely off the clutch pulley.
- Trace the wiring pigtail extending from the clutch field coil housing to the main chassis and unclip the factory electrical connector.
- Inspect the mower-side wiring socket for any brittle plastic or signs of melting, which indicates a past high-resistance short circuit in your electrical loop.
- Place your socket wrench onto the heavy central mounting bolt located in the middle of the lower clutch base.
- Lock the engine flywheel or insert a backup wrench on the upper crankshaft pulley to prevent the engine from turning counterclockwise during bolt removal.
- Turn the primary center bolt counterclockwise to unthread it completely, taking great care to catch the heavy structural retaining washer as it comes loose.
- Gently slide the complete clutch housing downward off the engine crankshaft.
If your old clutch has been exposed to fertilizer, rain, or high humidity for several seasons, rust may have fused the internal clutch sleeve to the steel shaft. Never use a heavy steel hammer to smash the outer pulley casing, as this will bend your engine crankshaft or crack the lower engine casing. Instead, spray a generous amount of high-grade penetrating oil directly into the center bore, let it soak for twenty minutes, and use a rubber mallet to give the sides of the housing a series of light, rhythmic taps to break the rust bond.
Polishing and Prepping the Engine Crankshaft
The overall lifespan of your new replacement clutch depends almost entirely on the cleanliness and condition of your engine shaft. A primary cause of immediate bearing failure in replacement PTO clutches is mounting a precision-machined part onto a dirty, rusted, or uneven crankshaft. If the new clutch sits even slightly crooked on the metal, it will create a high-speed wobble that destroys the internal ball bearings within a few cutting hours.
Perform these mandatory surface preparation steps:
- Take your fine-grit emery cloth or sandpaper and scrub the entire length of the engine crankshaft until the steel is completely bright and uniform.
- Clean all packed dirt, old grease, and metal burrs out of the long keyway slot cut into the side of the shaft.
- Wipe the polished shaft thoroughly with a rag dampened with a fast-evaporating solvent to clear away all metallic dust and grit.
- Coat the polished engine shaft with a thin, even layer of high-temperature anti-seize lubricant paste to prevent future component seizing.
Inspect your square woodruff key. If the key shows any signs of rounding, shaving, or shearing, discard it immediately and install a fresh hardened steel key. A damaged key allows the clutch to chatter on the shaft, which will score the crankshaft and cause permanent structural damage to your engine.
Installing Your Premium Replacement Clutch
With the crankshaft fully prepped and lubricated, you are ready to mount your new high-performance clutch. Align the internal keyway of the new clutch sleeve with the woodruff key on the engine shaft and lift the assembly straight upward. The unit should slide onto the shaft with a smooth, precision slip-fit.
To secure the replacement clutch correctly, verify these crucial alignment points:
- Locate the anti-rotation slot built into the top plate of the new clutch housing and guide it over the stationary stop bracket or pin welded to your Scag mower frame.
- Double-check that the anti-rotation pin sits fully inside the bracket slot with a slight amount of clearance, which prevents the coil housing from spinning while allowing it to float naturally.
- Thread the central mounting bolt and structural washer into the crankshaft base by hand for at least four full turns to avoid cross-threading the internal engine threads.
- Set your manual torque wrench to the exact factory specification of 50 to 55 foot-pounds.
- Lock the crankshaft from turning and pull the torque wrench smoothly until it clicks to ensure the bolt is locked perfectly.
- Route the integrated wiring harness pigtail up toward the main chassis connector and click the weather-tight plugs together securely.
Never use a pneumatic air impact gun to tighten the central mounting bolt. The violent hammering action of impact tools can fracture the internal electromagnetic coil windings and crush the precision ball bearing races, leading to immediate clutch failure upon first startup.
Conducting the Blade Burnishing Sequence
Before taking your Scag mower out to cut a heavy commercial property, you must complete the final mechanical validation and perform a proper blade burnishing process. Burnishing is a critical break-in procedure that ensures the new armature face and rotor surface match perfectly, maximizing the immediate torque holding capability of your new unit and preventing premature face glazing.
Follow this standard burnishing protocol:
- Reinstall your primary mower deck drive belt, making sure it sits completely square within the pulley grooves.
- Reconnect your battery cables and spark plug boots.
- Start your engine and move the mower to an open, safe testing zone away from obstacles or bystanders.
- Advance your manual throttle lever until the engine runs at approximately half-throttle speed.
- Flip your dashboard PTO switch to engage the cutting deck, let the blades spin for a brief two seconds, and turn the switch off.
- Allow the blades to come to a complete mechanical stop, wait ten seconds, and repeat this controlled engagement sequence fifteen consecutive times.
This deliberate cycling allows the new friction linings to wear in against one another smoothly, shaving down microscopic manufacturing imperfections and ensuring that you receive the full torque rating from your new part right from your first job.
Frequently Asked Questions
Why does my new replacement clutch make a light clicking sound when I engage it?
A sharp, clear metallic click during engagement is completely normal. That sound is the powerful electromagnetic coil magnetizing and pulling the steel armature plate flush against the spinning rotor face.
What happens if I forget to align the anti-rotation bracket during installation?
Failing to engage the anti-rotation bracket is extremely dangerous. When you start the engine, the entire outer field coil housing will spin with the crankshaft, instantly ripping the wiring pigtail out of the clutch body and shorting out your mower's main fuse.
Can I reuse the old central mounting bolt and washer?
If the original bolt threads are clean, unmarred, and free of rust pitting, it is generally safe to reuse them. However, if the bolt has been stretched by previous over-tightening or shows signs of corrosion, replacing it with a grade eight hardened matching fastener is highly recommended.
Keep Your Commercial Fleet Cutting Effortlessly
Taking the time to replace your own electric PTO clutch is an exceptional way to maintain your commercial equipment to professional standards while avoiding unnecessary shop fees. By focusing on thorough shaft preparation, precise mechanical alignment, and proper manual torque values, you protect your investment from premature wear and ensure clean cutting performance across every property. The Scag 461715 is a reliable component when installed with care, keeping your deck operating at maximum speed through all cutting conditions. To secure commercial-grade replacement parts engineered for demanding outdoor environments, explore the inventory at XtremeOPE.com to keep your business moving forward.